Tuesday, June 30, 2009

Check: Rehearsal Dinner

So after looking at some places and taking into account what we wanted our rehearsal dinner to be like, Mike and I decided on our Rehearsal dinner location and menu tonight.
Those who are close to us will appreciate this..........
Rehearsal Dinner location: Johnny Malloys in Lakewood!
Mike and I met at Johnny Malloys almost three years previous to the date of the rehearsal. Five of the ten people in our wedding were there and know the whole story of us meeting.

Meg at Johnny Malloys is really excited about doing a rehearsal dinner and said it's the first one they have ever done. We have decided to have a sit down dinner with a 6 different entrees for the guests to choose from. They have a private room with a full bar that we will be in for the rehearsal. The guest will be able to order drinks from the bar, and since Meg was so excited about it being the first rehearsal, we are getting happy hour pricing.

We know it isn't anything fancy, but it is us. It is where we met and is relaxed. We want the reheasal dinner to be relaxing. It is our time to spend with the main people in our lives and we wanted a comfortable, relaxed place to do that in. We have plently of time the next day to be formal.

I would suggest thing type of rehearsal to anyone who is not looking for the traditional rehearsal dinner.

Ohhh... and for a sneak peak at my amazing rehearsal dinner dress that I bought this week and Banana Republic...


I got it in the pewter color. I am in love with it :)

Monday, June 29, 2009

Busy Wedding Weekend - Just Not Mine :)

This weekend was filled with Wedding related activities for friends of mine.

The weekend started with Megan's bachlorette party in Port Clinton, OH. We spent the night at a beachfront condo at Water's Edge, that had a pool and three bedrooms. The condo was great and a good idea for anyone looking for a nice big place up there.


We didn't go over to Put-In-Bay, but if you stayed there and wanted to go to Put-In-Bay, the condo was just a mile from the Jet Express.

Megan gave all the girls who came to her party a wine glass with a ribbon on it and the girls name. The girls who she knew that drank red wine got special red wine glass and the girls who drank white wine got white wine glasses.


It was really nice that they were custom to what kind of wine we drink - and so cute :)
The second part of the weekend, I spent going to my friend Lauren's bridal shower. She had it at St. Clarence in North Olmsted. They had a really cute room all set up and brought in a caterer with food and drinks. Lauren had about 150 people there, and the whole shower was over in less than 2.5 hours! They were gift opening machines. Cute place though for anyone looking for a bridal shower location. They were able to bring in their own food and drinks, which is always nice and budget friendly!!!
After the weekend I was exhausted, but had an amazing time. Thanks girls :)

Thursday, June 25, 2009

Good Advice: Top Mistakes when Choosing a Photographer

I was reading through my RSS feed this morning and saw this interesting post on Wishpot Wedding Blog about choosing a photographer. Check it out if you are still in the market for a photographer. When I was reading through it, I could relate to some of these with some of the people I met with. The seven mistakes they point out are:

1. Relying on Wedding Vendor Reviews
2. Judging Photographer's based on their Greatest Hits wedding album
3. Paying too much attention to the sales pitch
4. Not assessing the photographers personality
5. Choosing "Uncle Bob" to shoot your wedding
6. Caring about the photographers type of camera equipment
7. Confusion over pricing

Check out the whole post here: Vendor spotlight: Dubnoff Photography Top 7 Mistakes Couples make When Picking a Photographer

Thursday, June 18, 2009

Lauren's How To: Creative Bar Area Decorations

My reception hall Massimo Da Milano has a seperate room for the bar and appeitizers that I have been looking into different decoration options for. I found this picture while searching online one day and thought it set the mood for the bar area of a reception.

photo credit the knot
I didn't want to spend anymore money on my floral budget, so I decided to DIY these.
Step 1: Buy a tall cyclinder vase (bought at Flower Factory), floralytes (bought at Pat Catan's), glass beads (bought at Flower Factory), baby's breathe (bought at Giant Eagle), floating candle (bought at Pat Catan's)

Step 2: Place floralytes in the bottom of the vase. (I used three in the vase shown below)

Step 3: Place the glass beads on top of the floralytes.

Step 4: Place the baby's breathe in the vase.

Step 5: Fill the vase with water (this will weigh the babys breathe down and make it sink into the vase better)

Step 6: Place floating candle on top of water.

Final Product:

Now I just have to do a couple more and purchase some mirrors to put the vases on. Quick DIY project that really has a big impact!

Friday, June 12, 2009

Lauren's How To: DIY Aisle Runner

So a couple weeks back, my fellow bride-to-be friend Tara and I decided that we were going to take a try at DIY painting our monograms on our aisle runners. If you are thinking about doing this, I would highly suggest it. It was not hard - just really time consuming, but totally worth it.


Step 1: Purchase a premade aisle runner or purchase fabric to use. We purchased our premade aisle runners at Pat Catan's for $25. Also purchase fabric paint. We got our at JoAnn Fabrics.

Step 2: Get monogram enlarged to the size you want it to be painted on the aisle runner.


Step 3: Roll aisle runner out and determine where you want your monogram placed on it. I designed mine to go in the back of the church where the pews start. My aisle runner has to be placed before the ceremony and pinned to the floor (church's rule) so I decided that would be the best place for it. Tara is allowed to roll hers out right before she walks down the aisle so she decided to flip the monogram so when people walked out it would be right side up.


Step 4: Place printed monogram under the aisle runner.

Step 5: Place wax paper in between paper monogram and aisle runner so when the aisle runner dries, it doesn't stick to the paper. Tape aisle runner, wax paper and monogram paper together.

Step 6 Use a pencil or pen to trace the printed monogram onto the aisle runner.


Step 7: Once traced, use fabric paint to paint your monogram onto the aisle runner.
Step 8: Let monogram dry, and repeat painting if needed.


The finished products: (at least finished for right now, I bet both of will be obsessing over touching them up!)

*Tara I stole this picture from theknot, didn't think you'd mind ;)*
I would recommend doing this to anyone who is considering it. It wasn't as hard as we thought, just time consuming. In the end it was totally worth it!

Wednesday, June 10, 2009

Lauren's How To: Make Floral Hair Pins

I was in The Perfect Bride in Rocky River with my sister when she was getting measured for her bridesmaid dress when I stumbled upon this pretty hair flower.
I instantly fell in love with the flower, and wanted to get one for each of my bridesmaids to wear at the reception - something different to set a party atmosphere. The only problem was each flower was priced at $75.

I decided that I was going to try to replicate this flower on my own with a little creative DIY project.

First I went to JoAnn Fabrics and bought - fabric, pearl beads, glass beads and thread.


I then cut out a pattern for the flowers.

I pinned the pattern of the flower to the fabric and cut the shape out. I did more than one layer of fabric at a time to make sure every pins flowers matched (plus it takes less time ;) )


I then removed the pattern and arranged the flowers the way I wanted the hair pin to look.

With the thread I bought, I strung the pearls and the glass beads on one at a time. For each flower I used two glass beads, two larger pearls, and two little pearls.

Once I was done stringing the beads, the hair pin was done!

I continued this same process 5 times until I made one for each of them.

Now I will attach this flower to a hair pin, and they will be set.

So you may be wondering, did she end up doing it for less than $75 (and I really hope you didn't think it would cost anywhere near that amount...)

The grand total of this project for each flower hair pin......... $3.25. So I made all 5 for less than $20. I love DIY projects! :)

Tuesday, June 9, 2009

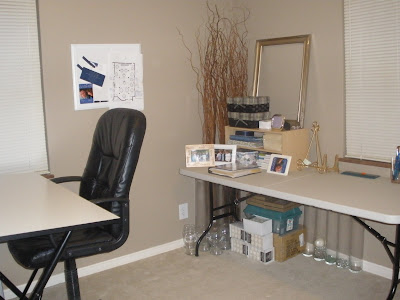
Girl Cave! :)

So you typically hear about guys having a "man cave" in the house. Well I decided that I needed a girl cave. I was sick of having my wedding projects and scrapbooking things scattered around the house, and having to sit at the kitchen table any time I wanted to do anything. So..... introducing my girl cave.


The girl cave, formally "Amanda's Bedroom" as one of my bridesmaids referred to it as, now has ample storage for all my projects and plently of room to work. If I am not done with a project, I can just close the door and not worry about it.
I would suggest every crafty girl gets her own girl cave!

Mike on the otherhand was very sad that the girl cave was set up before he was able to set up a man cave in the basement....

He will get over it!